22 Basic Photography Techniques You Need To LEVEL UP!
Despite what many might think, photography is a skill anyone can learn.
Sure, there are those of use who naturally have an eye for photography, but with the basic skills and principles, anyone can be just as good at photography!
Learning photography techniques can help you take better pictures of anything you want. Whether you’re a legit photographer, hobbyist, or someone who just wants to take better iPhone pics.
You’ll be surprised how quickly you can go from beginner to pro!
Basic Photography Techniques for Beginners
Let’s get started with some basics that’ll make a big difference in your pictures.
1) Rule of Thirds
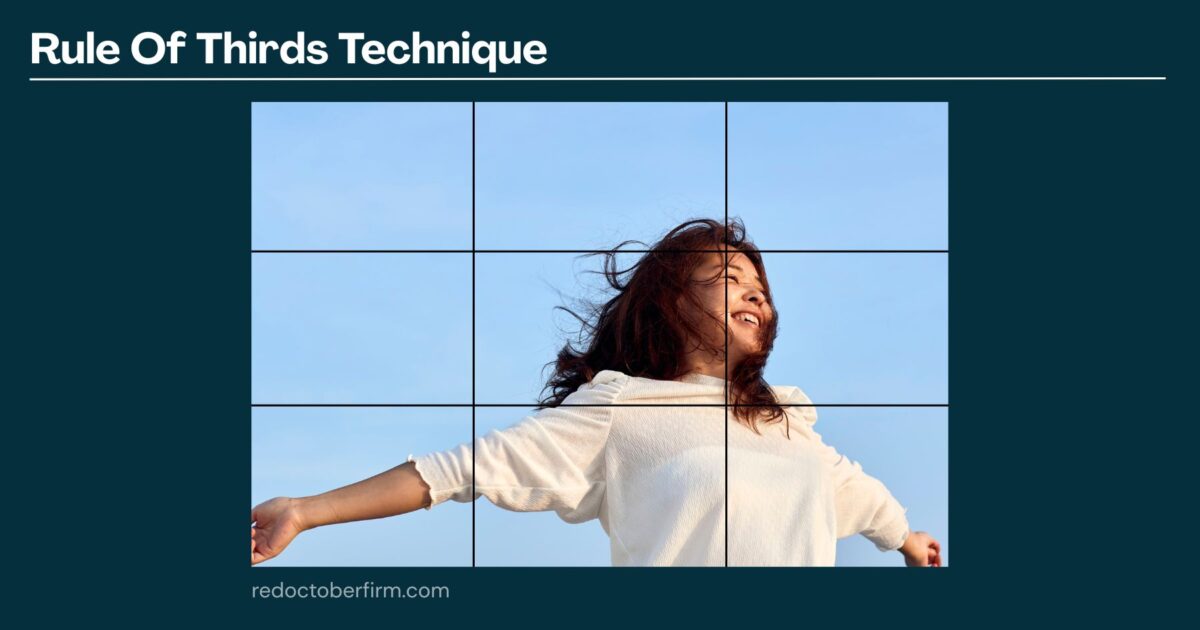
The rule of thirds is a simple but powerful photography trick. Imagine your photo split into a 3×3 grid.
This creates nine equal boxes.
The key is to place important parts of your scene along these lines or at their intersections. These spots naturally draw the eye.
For example, put a person’s face where two lines meet. Or line up a horizon with the top or bottom horizontal line.
This rule helps create balanced, interesting photos. It stops you from always putting your subject in the middle.
Many cameras have a grid view option. Turn this on to help you practice. Soon, you’ll do it without thinking.
Mastering the rule of thirds gives you a strong starting point for great photos.
2) Leading Lines

Leading lines are a powerful tool in photography. They guide the viewer’s eye through the image.
You can use roads, fences, or rivers as leading lines.
Look for natural lines in your surroundings. These could be straight or curved. They work best when they lead to an interesting subject or focal point.
Try positioning your camera to make the most of these lines. You can place them diagonally across the frame for a dynamic feel. Or use them to create depth in your photo.
Also, leading lines don’t have to be obvious. Subtle lines can work just as well. They can be the edge of a building or even shadows on the ground.
Practice spotting leading lines in everyday scenes. Soon, you’ll see them everywhere you look. This skill will help you create more compelling photos.
3) Golden Hour

The golden hour is a special time for taking photos.
It happens twice a day, right after sunrise and just before sunset. During this time, the light is soft and warm, giving everything a beautiful glow.
You can use this magical light to make your pictures look amazing. The golden hour is perfect for portraits. The soft light makes people’s skin look smooth and radiant.
For landscape photos, the golden hour adds depth and drama. Long shadows create interesting patterns, and the warm light brings out rich colors in nature.
To make the most of the golden hour, plan ahead. Check when the sun rises and sets in your area. Get to your location early so you have time to set up.
Note: Golden hour doesn’t last long. Be ready to shoot quickly and change your settings as the light changes. With practice, you’ll capture stunning photos during this special time of day.
4) Symmetry
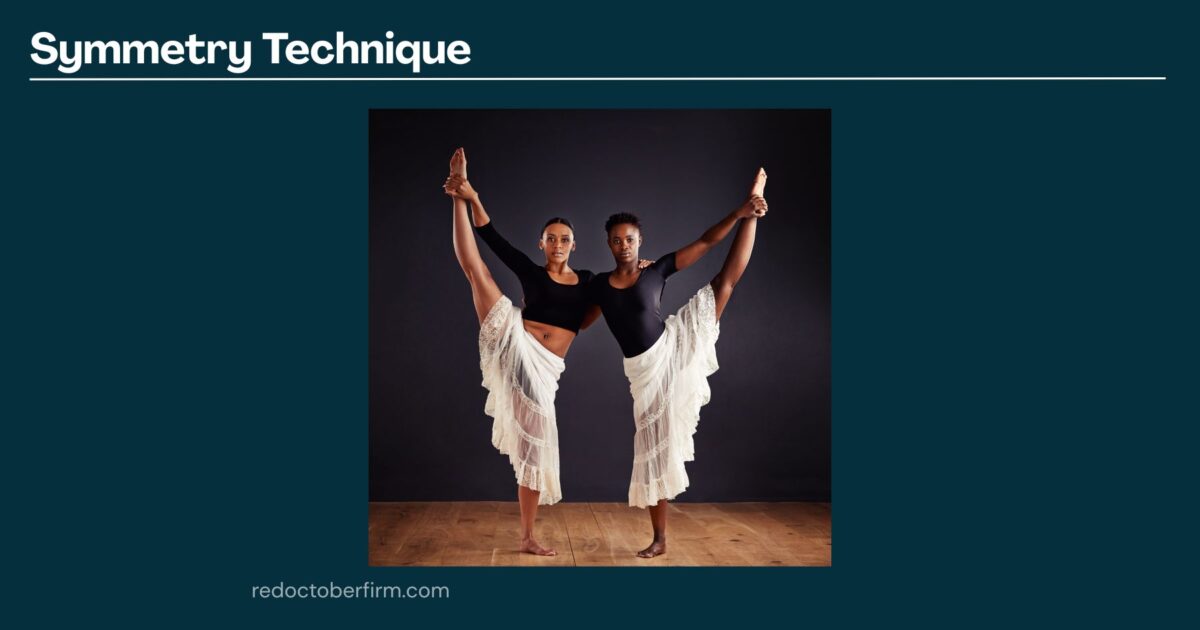
Symmetry is a powerful tool in photography. It creates balance and harmony in your images. You can find symmetry in nature, architecture, and even people.
To use symmetry, look for scenes with mirror-like qualities. Think of reflections in water or glass buildings. Try to position your camera so both sides of the image match up.
You can also create symmetry by how you frame your shot. Place your subject in the center of the frame. Make sure the left and right sides are equal.
This works well for portraits or photos of buildings.
Don’t be afraid to break symmetry a little. Adding a small element that doesn’t match can make your photo more interesting. It gives the viewer’s eye something to focus on.
Practice spotting symmetry in everyday life. Once you start looking, you’ll see it everywhere. It’s a great way to improve your composition skills and create eye-catching photos.
5) Reflections
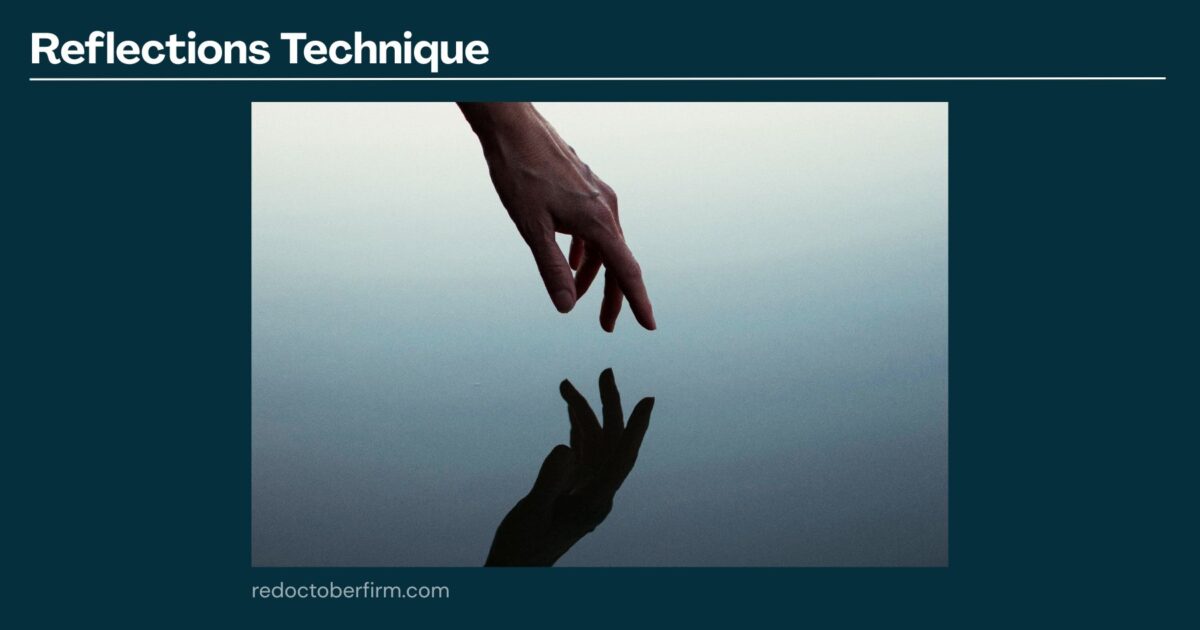
Reflections can add a magical touch to your photos.
They create a mirror-like effect that doubles the visual interest. You can find reflections in many places around you.
Look for smooth surfaces like still water, glass windows, or polished metals. These work great for capturing reflections. Try shooting during the “golden hour” just after sunrise or before sunset for the best light.
Position yourself to include both the subject and its reflection in the frame.
This creates balance and symmetry in your shot. You can also focus on just the reflection for a unique perspective.
Experiment with different angles to change how the reflection appears. Moving slightly can make a big difference in your final image. Don’t forget to steady your camera to keep everything sharp.
6) Negative Space

Negative space is the empty area around your main subject in a photo. It’s a powerful tool to make your images stand out. When you use negative space well, it draws attention to your subject.
You can create negative space with plain backgrounds like walls or sky.
It doesn’t have to be boring though. Try using blurred backgrounds or simple patterns too.
To practice, look for scenes with clear subjects and lots of empty space around them. A lone tree in a field or a single person on a beach are great examples.
Negative space can create a sense of calm or make your subject seem small. It’s also useful for leaving room for text if you’re making posters or social media posts.
Balance is key. Too much negative space can make your photo feel empty. Not enough can make it feel cluttered. Play around and find what works for you.
7) Depth of Field
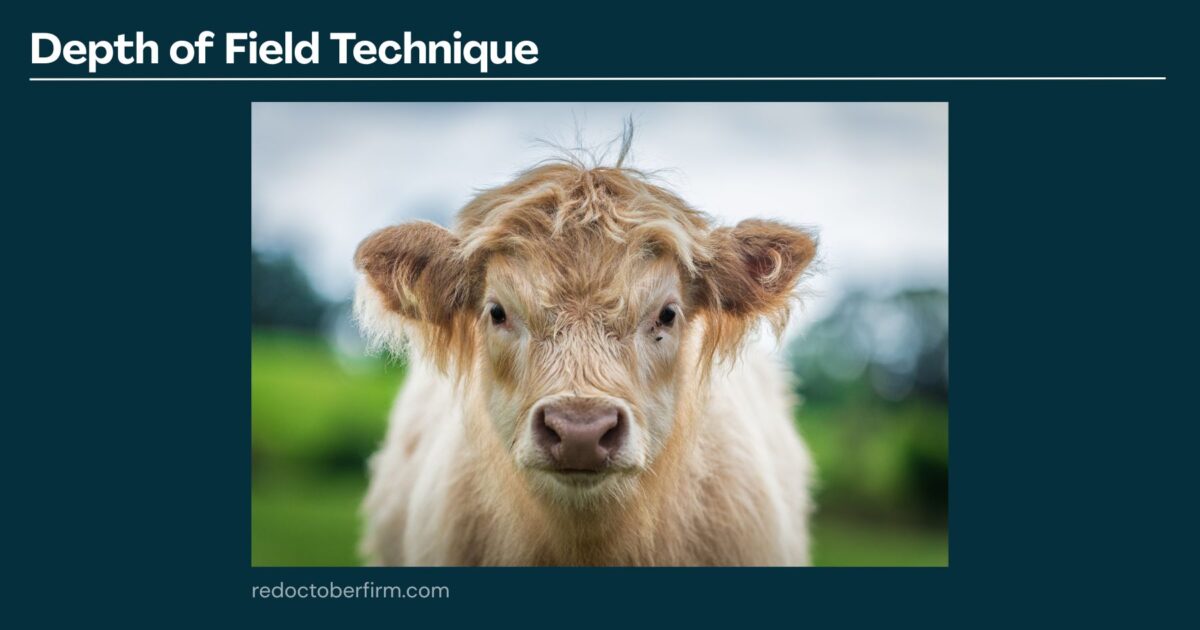
Depth of field is how much of your photo is in focus. It’s the distance between the nearest and farthest objects that look sharp in a picture.
You can control depth of field with your camera’s aperture setting. A wide aperture (small f-number) gives you a shallow depth of field. This means only a small part of your image will be in focus.
A narrow aperture (large f-number) creates a deep depth of field. More of your photo will be sharp from front to back.
Try using a shallow depth of field to make your subject stand out. It’s great for portraits or close-up shots of flowers. The background will be blurry, drawing attention to your main subject.
For landscapes, you might want everything in focus. Use a narrow aperture to keep both nearby objects and distant scenery sharp.
8) Bokeh
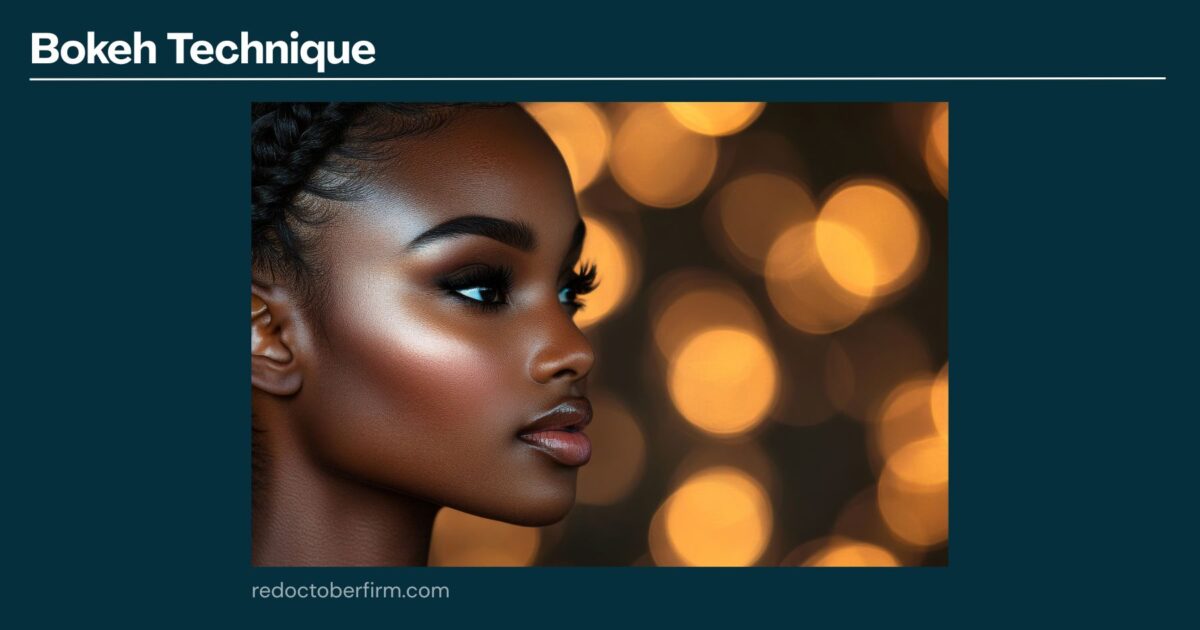
Bokeh is a cool effect that makes the background of your photos look blurry and dreamy. It happens when you use a wide aperture on your camera lens. This creates a shallow depth of field.
To get bokeh, use a lens with a large maximum aperture. f/1.8 or wider works well. Set your camera to aperture priority mode and choose the widest aperture.
Get close to your subject and make sure there’s some distance between them and the background. Light sources in the background often create pretty bokeh shapes.
Try shooting portraits with bokeh. It makes your subject stand out by blurring everything else. You can also use it for still life or nature photography to add a soft, artistic touch.
Experiment with different apertures and distances to see how it changes the bokeh effect. Soon you’ll be creating beautiful, dreamy images with ease.
9) Fill the Frame

Filling the frame is a simple yet powerful technique to make your photos more eye-catching.
It means getting close to your subject so it takes up most of the picture.
You can do this by moving closer or using your zoom lens. When you fill the frame, you cut out distracting backgrounds and focus on what’s important.
This technique works great for portraits. Get close to capture facial expressions and details. It’s also good for nature shots. Fill your photo with a colorful flower or interesting leaf pattern.
Reminder: you don’t always need to show the whole subject. Sometimes a part can tell the whole story. Try capturing just a person’s hands or eyes for a unique shot.
Filling the frame helps viewers connect with your subject. It creates stronger, more impactful images that grab attention. So next time you’re taking photos, get closer and fill the frame!
10) Perspective
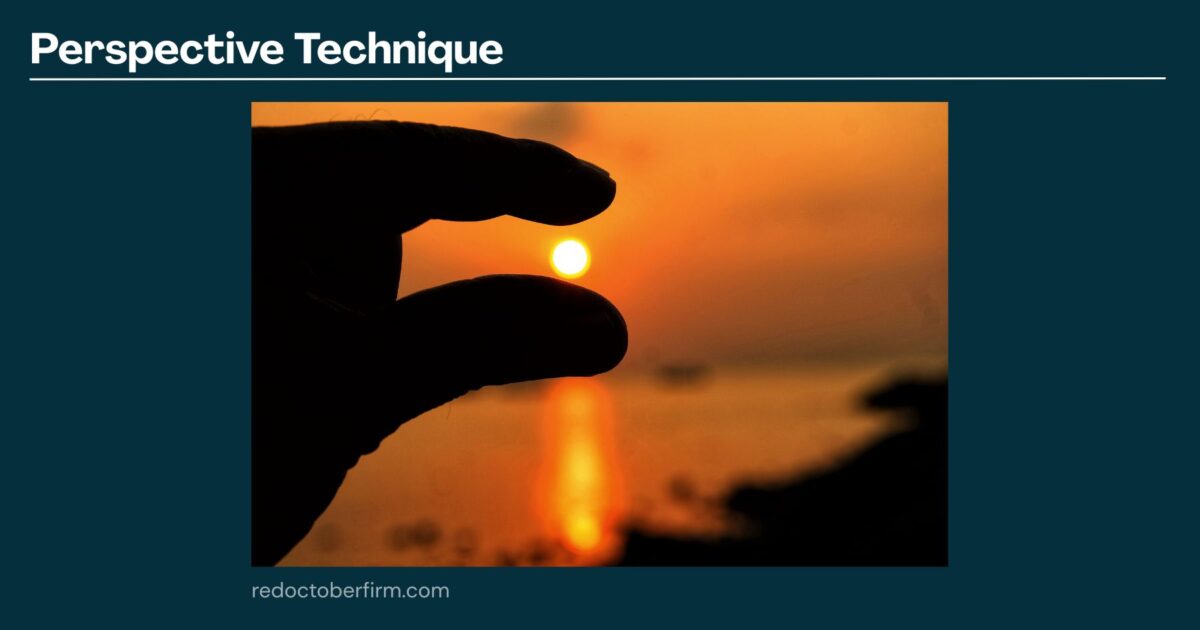
Perspective in photography is all about how you show depth and space in your images. It’s a way to make your photos more interesting and tell a better story.
One easy way to play with perspective is to change where you stand. Try getting low to the ground or climbing up high. This can make everyday scenes look fresh and new.
You can also use lines to create perspective.
Another cool trick is to use objects of different sizes. Put something small in the foreground and something big in the background. This contrast helps show distance and scale.
Photo Tip: Perspective is all about your point of view. Move around, try different angles, and see how it changes your photos. With practice, you’ll find new and exciting ways to capture the world around you.
11) Worm’s Eye View

A worm’s eye view is a unique way to take photos. It means getting really low to the ground and pointing your camera upwards. This angle can make things look bigger and more impressive.
To try this technique, lie down on the ground or put your camera very close to the floor. Look up at your subject and snap the picture. It works great for tall buildings, trees, or even people.
This view can add drama to your photos. It makes objects seem taller and more powerful. You can use it to show off architecture or make everyday things look different.
Remember to keep your camera steady when you’re so low. A small tripod can help if you have one. Play around with different subjects and see how this angle changes them in your photos.
12) Silhouette
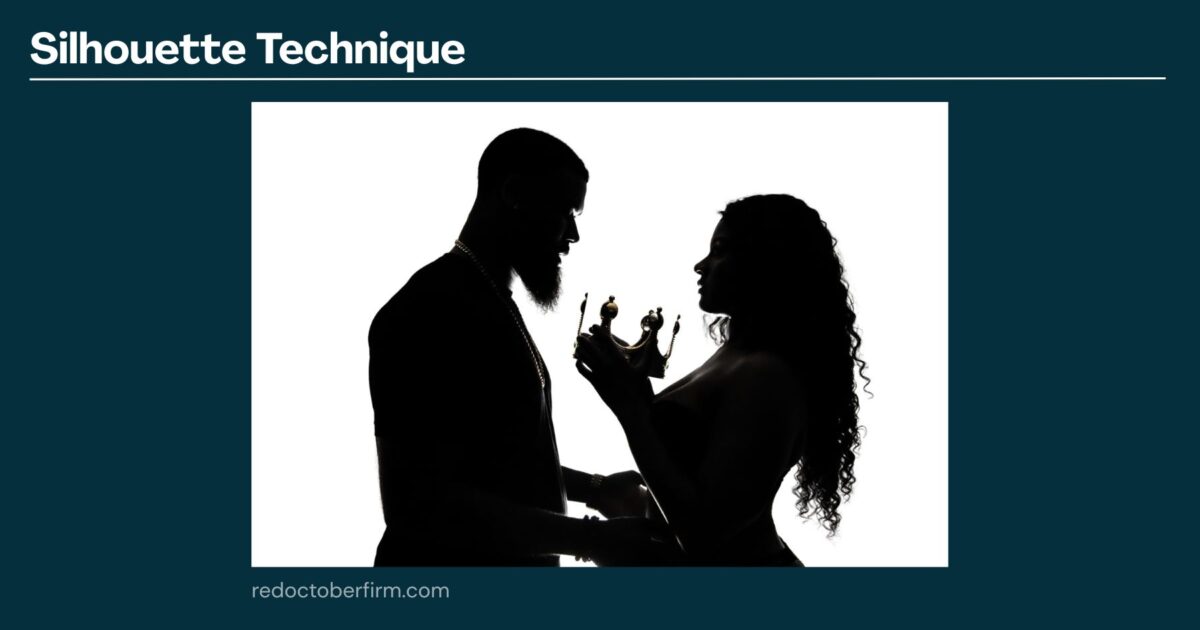
Silhouette photos create a striking contrast between a dark subject and a bright background. You can make these eye-catching images by placing your subject in front of a light source.
To start, find a bright backdrop like a sunset or a well-lit window. Position your subject between you and the light. This will turn them into a dark shape against the bright background.
Set your camera to manual mode for better control. Lower your ISO and use a small aperture (high f-number) to keep everything in focus. Adjust your shutter speed to expose for the bright background.
Try different poses and angles to create interesting shapes. Silhouettes work great for portraits, landscapes, and even action shots. You can also experiment with partial silhouettes, leaving some details visible in your subject.
Just keep practicing and don’t be afraid to take lots of shots and have fun with this technique!
13) Panning
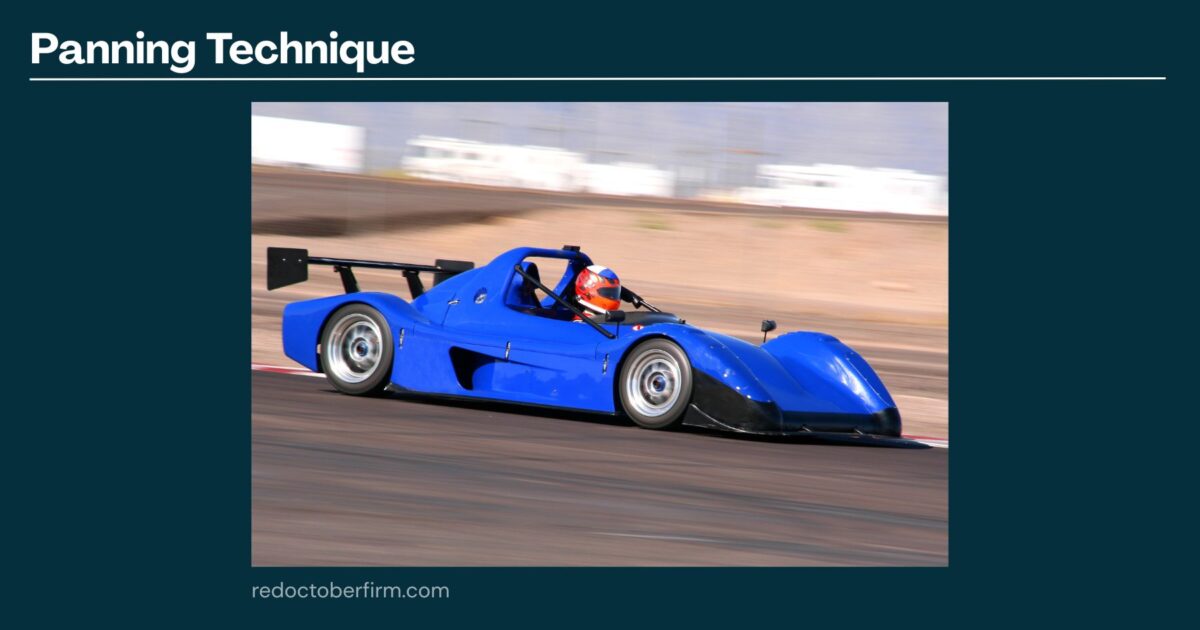
Panning is a cool photo technique that captures motion in a unique way. You move your camera to follow a moving subject, keeping it in focus while blurring the background.
To try panning, pick a subject that’s moving across your view. This could be a car, a runner, or even a bird in flight. Set your camera to a slower shutter speed, around 1/30 to 1/60 of a second.
As your subject moves, turn your body smoothly to track it. Keep the subject in the same spot in your viewfinder as you press the shutter. This takes practice, so don’t get discouraged if your first attempts are blurry.
The result? Your subject stays sharp while the background streaks by, creating a sense of speed and movement. It’s a fun way to add excitement to your photos and show action in a single frame.
14) Backlighting
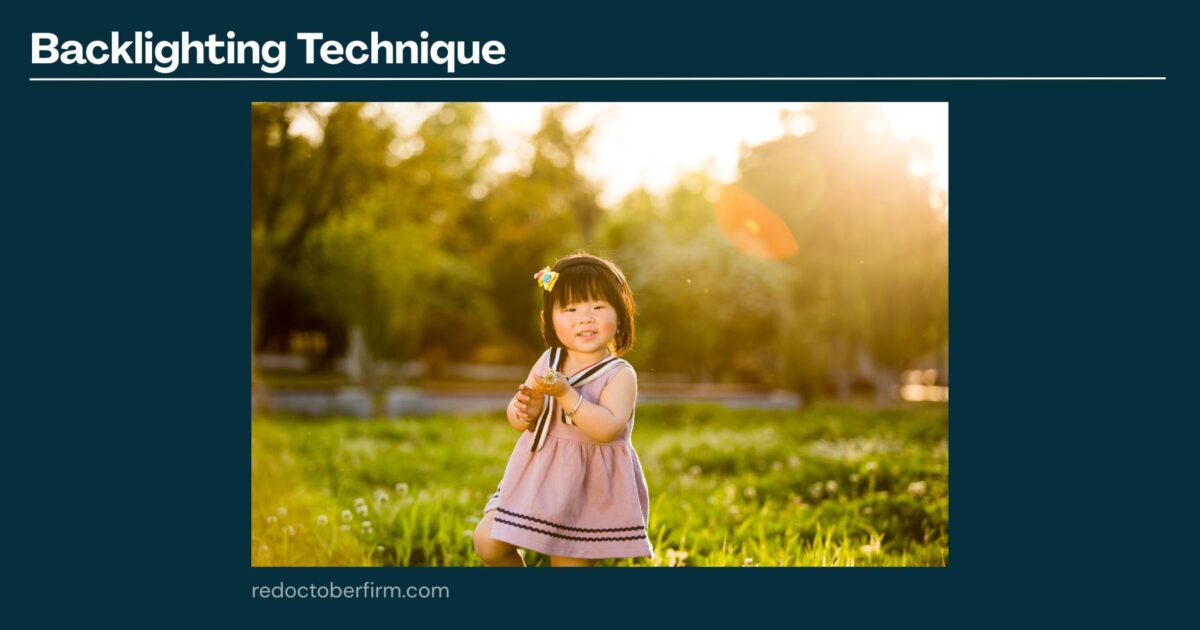
Backlighting happens when the main light source is behind your subject. This creates a glowing effect around the edges of your subject. It can make for some really cool and dramatic photos.
To use backlighting, position your subject between you and the light source. This could be the sun, a window, or even a lamp. The light will shine from behind, creating a halo-like effect.
You might need to adjust your camera settings to get the right exposure. Try using spot metering on your subject’s face. This helps your camera figure out the right settings.
Experiment with different angles to see how the light changes. Moving slightly to the left or right can create interesting shadows and highlights. You can also try silhouettes by letting your subject be completely dark against the bright background.
Backlighting works great for portraits, nature shots, and even still life photos. Give it a try next time you’re out shooting!
15) Color Theory
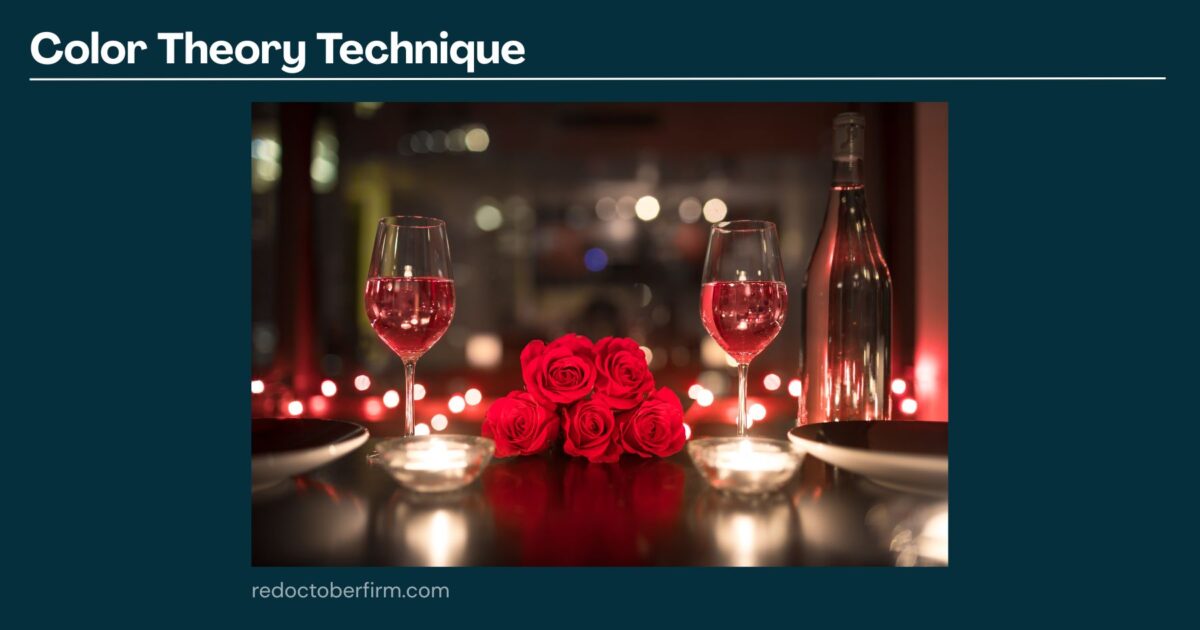
Color theory is a key part of photography. It helps you make your photos look better. The color wheel is a useful tool to understand how colors work together.
Some colors go well together. These are called complementary colors. They sit across from each other on the color wheel. Blue and orange are an example. Using these colors can make your photos pop.
Warm colors like red and yellow can make a photo feel cozy. Cool colors like blue and green can make it feel calm. You can use this to set the mood in your pictures.
Try to keep your color choices simple. Too many colors can be confusing. Pick a main color and use others to support it. This can make your photos look more put together.
Pay attention to the colors around you when you’re taking photos. Look for interesting color combinations. With practice, you’ll get better at using color to make your photos stand out.
16) Monochrome

Monochrome photography uses only one color or shades of one color. It’s often black and white, but can be any single hue. This style creates a timeless, artistic look.
To try monochrome, switch your camera to black and white mode. If you’re using a smartphone, look for a monochrome filter in your camera app. This lets you see the scene in black and white as you shoot.
Pay attention to contrast when shooting in monochrome. Look for strong lights and darks to make your images pop. Textures and patterns also stand out more in black and white.
You can also create monochrome images by editing color photos later. Most editing apps have tools to convert images to black and white or other single-color styles.
Experiment with different subjects in monochrome. Portraits, landscapes, and street scenes all work well. You might be surprised how different familiar scenes look without color!
17) Light Painting
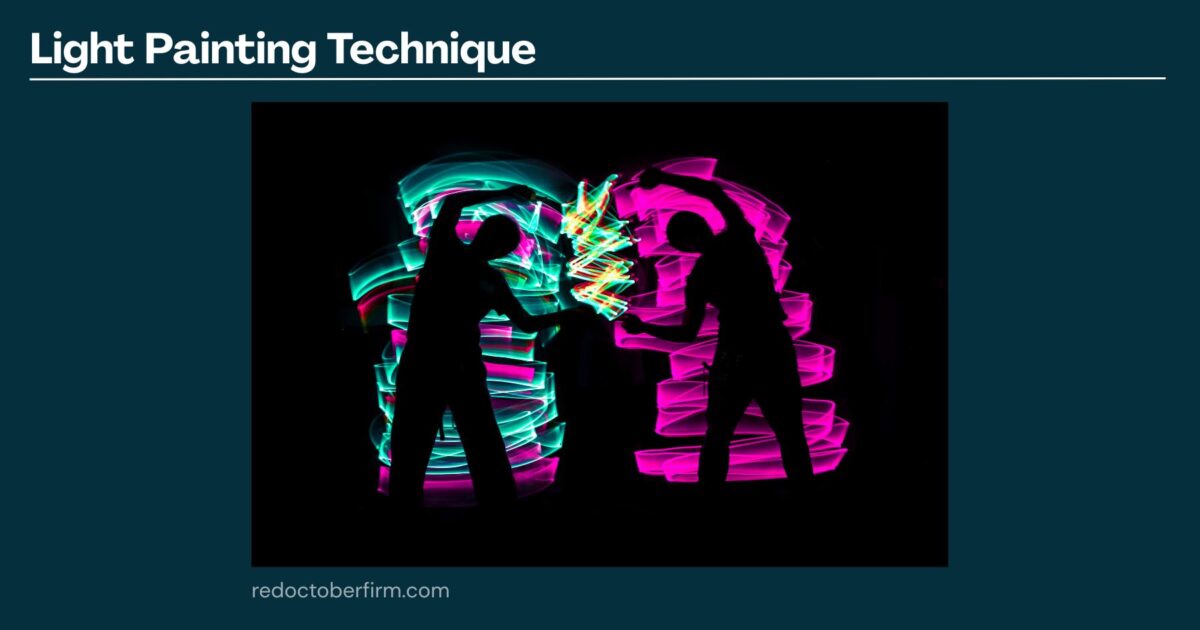
Light painting is a fun technique that lets you create cool glowing effects in your photos. You’ll need a dark setting and a camera that can do long exposures.
Start by setting up your camera on a tripod. Use a slow shutter speed, like 10-30 seconds. This gives you time to “paint” with light.
For the painting part, you can use flashlights, glow sticks, or even sparklers. Move these light sources in front of the camera while it’s taking the picture. You can draw shapes, write words, or make cool patterns.
Helpful Tip: Stay out of the frame unless you want to appear as a ghost-like figure. Play around with different light sources and movements to create unique effects.
Light painting takes practice, but it’s super rewarding. You’ll end up with eye-catching photos that look almost magical. Give it a try on your next night out with your camera!
18) HDR
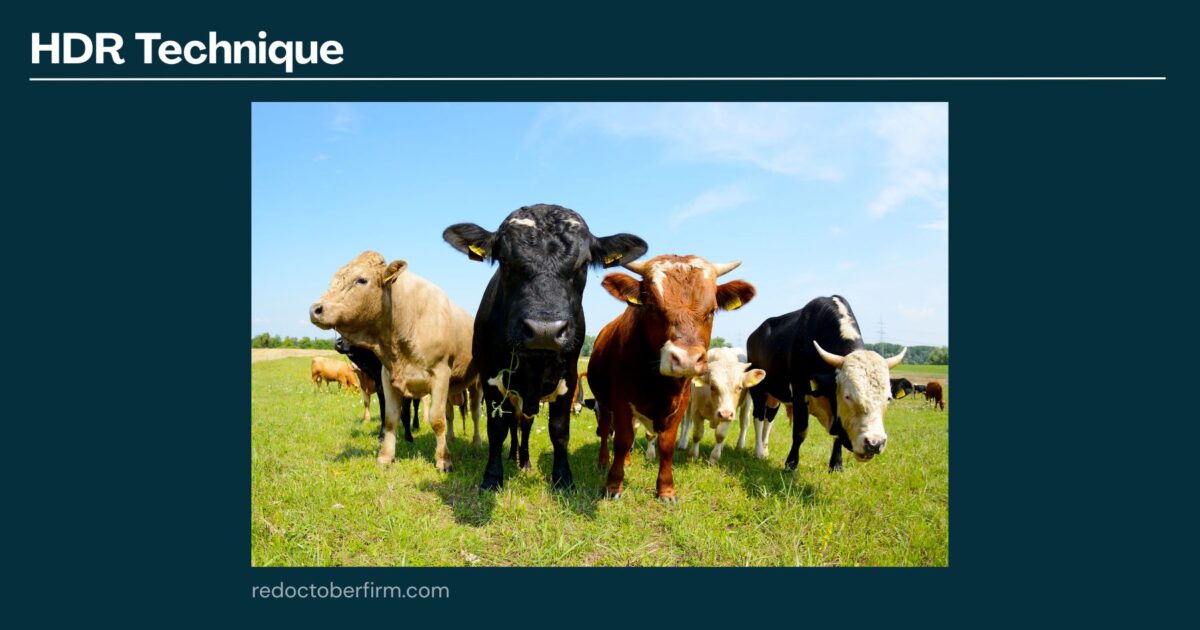
HDR stands for High Dynamic Range. It’s a technique that lets you capture more detail in very bright and very dark areas of a photo.
When you use HDR, your camera takes multiple shots at different exposures. It then combines these shots into one image. This gives you a picture with more balanced lighting.
HDR is great for scenes with strong contrasts. Think of a sunset with a dark landscape. Or a room with bright windows and shadowy corners.
To try HDR, start by setting your camera to bracket mode. This takes several shots in quick succession. Then, use software to merge these shots into one HDR image.
Remember, HDR can look unnatural if overdone. Aim for a balanced look that keeps the scene realistic. With practice, you’ll learn to use HDR to make your photos pop without going overboard.
19) Long Exposure
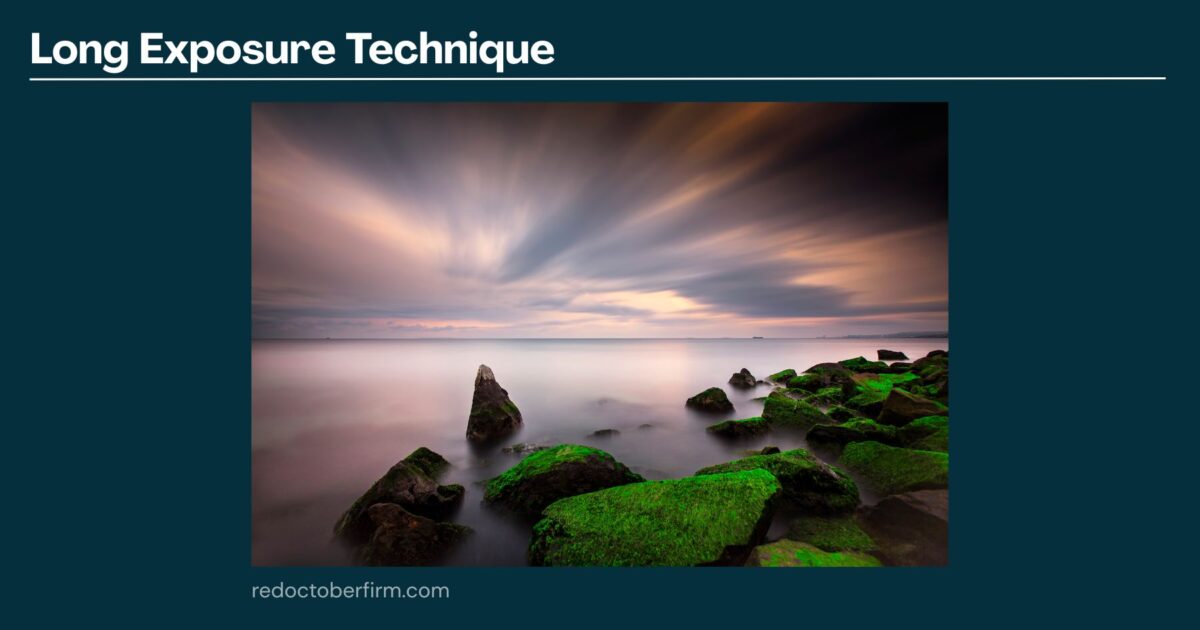
Long exposure is a cool photo technique that can create stunning effects. It keeps your camera’s shutter open for a longer time than usual. This lets more light hit the sensor, which can make moving objects look blurry or streaky.
You can use long exposure to capture light trails from cars at night. It’s also great for smoothing out water in rivers or waterfalls. The slow shutter speed makes the water look silky and dreamy.
To try long exposure, you’ll need a tripod to keep your camera steady. Set your camera to manual mode and choose a slow shutter speed. This could be anywhere from 1 second to several minutes, depending on what you’re shooting.
Start with a shutter speed of about 5 seconds and see how it looks. You might need to adjust based on the amount of light and the effect you want. Also, use a low ISO to avoid grainy photos.
20) Candid Shots

Candid shots capture people in natural, unposed moments. They show real emotions and actions. To take great candid photos, be ready with your camera at all times.
Try to blend in with your surroundings. People act more naturally when they don’t notice you. Use a longer lens to shoot from a distance without being seen.
Look for interesting expressions or activities. A child’s laugh or a friend’s thoughtful gaze can make for a compelling image.
Don’t use flash for candid shots. It can startle people and ruin the moment. Instead, use natural light or adjust your camera settings for low light.
Be patient and take lots of photos. You might need to snap many pictures to get that perfect candid moment. Practice often to improve your timing and eye for natural scenes.
21) Black and White
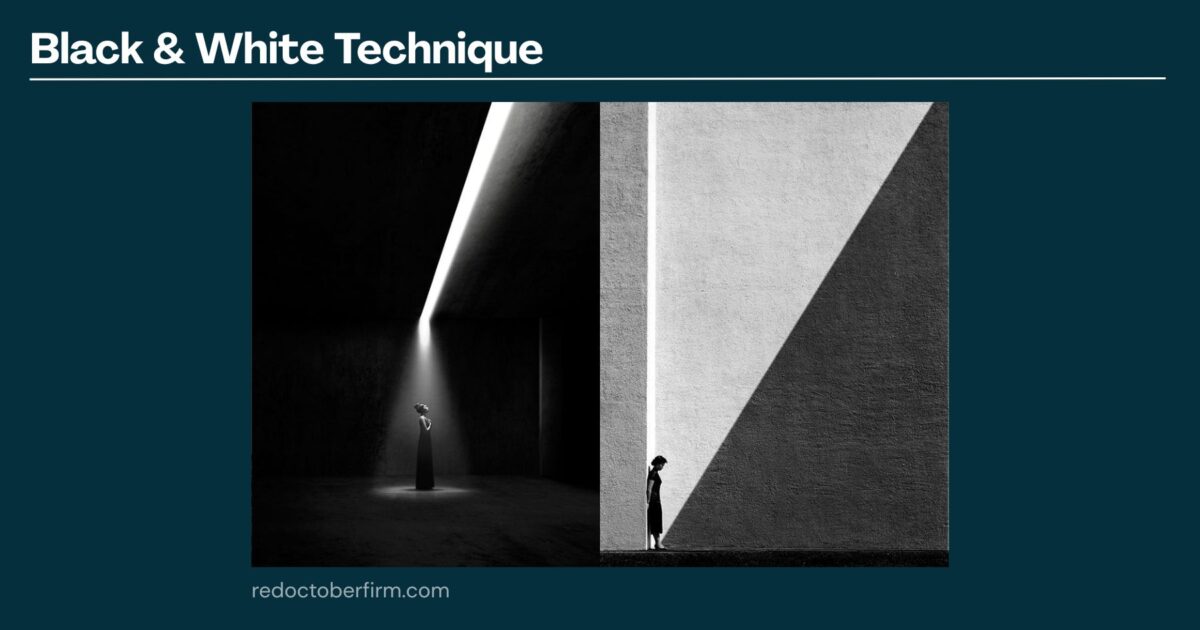
Black and white photos can create a timeless look. They strip away color distractions and focus on shapes, textures, and contrast.
To start, switch your camera to monochrome mode. This lets you see in black and white as you shoot.
Look for strong contrasts between light and dark areas. Bright highlights and deep shadows make for striking images.
Pay attention to textures. Without color, details like rough bark or smooth metal stand out more.
Try different filters to change how colors translate to shades of gray. A red filter can darken blue skies, while a yellow filter can brighten skin tones.
Experiment with high contrast for dramatic effects. Or go for softer, low contrast looks for a dreamy feel.
Edit your photos to fine-tune the balance of lights and darks. Adjust brightness and contrast to make your image pop.
22) Sun Flares
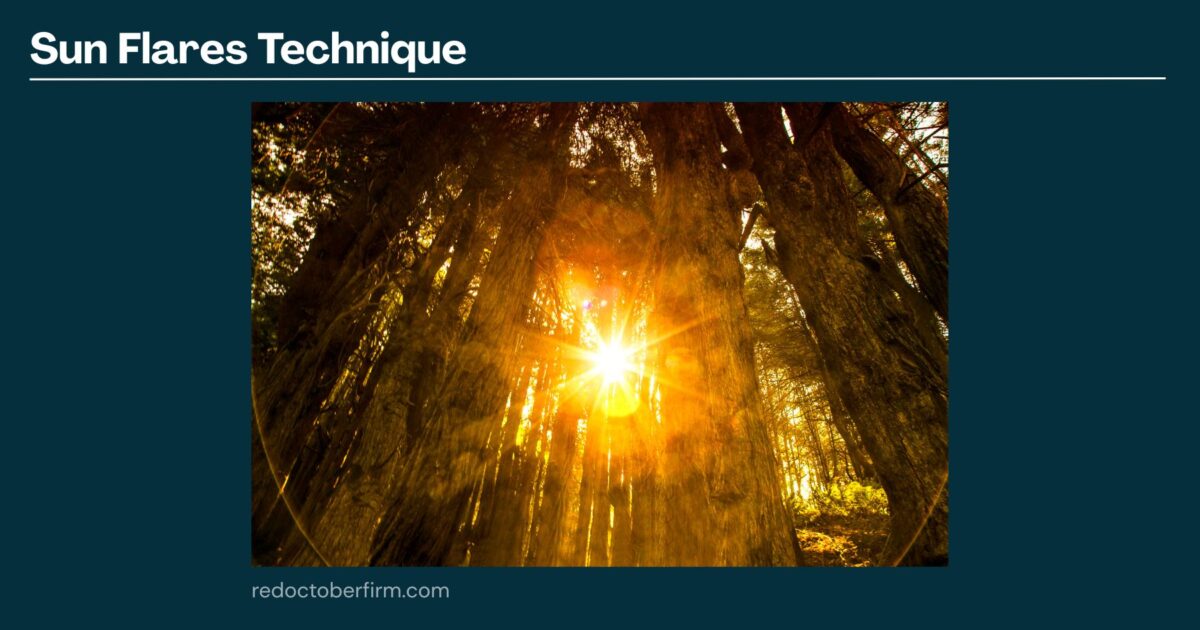
Sun flares can add a beautiful touch to your photos. They happen when sunlight hits your camera lens directly. This creates a burst of light in your image.
To capture sun flares, position the sun just out of frame. You can peek it out from behind objects like trees or buildings. This technique works best during golden hour, right after sunrise or before sunset.
Try different angles to see how the flare changes. Move your camera slightly up, down, or to the side. Each tiny shift can create a new effect.
Use a small aperture (high f-number) to make the flare more defined. F/16 or higher often works well. You might need to adjust your shutter speed to balance the exposure.
Don’t forget to protect your eyes when looking towards the sun. Use your camera’s live view screen instead of the viewfinder when composing your shot.
